नवम्बर . 22, 2024 01:05 Back to list
installing expansion bolts
Installing Expansion Bolts A Step-by-Step Guide
Expansion bolts are an essential tool in construction and DIY projects, particularly when you need to attach something securely to a masonry wall or concrete surface. They work by expanding upon installation, creating a tight grip that can withstand significant loads. This article will guide you through the process of installing expansion bolts effectively.
Understanding the Components
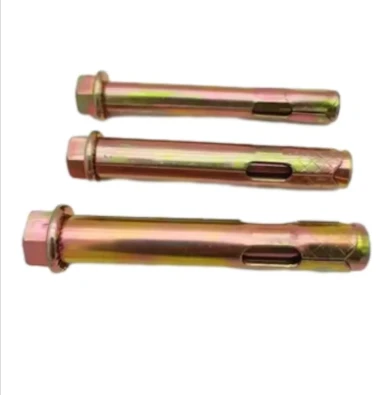
Before diving into the installation process, it’s crucial to understand the components of an expansion bolt. Generally, expansion bolts consist of
1. Bolt The threaded portion that provides the tensile strength. 2. Expansion Sleeve A cylindrical sleeve that expands against the material when the bolt is tightened. 3. Nut and Washer Used for securing the bolt in place.
Tools and Materials Required
Before starting the installation, gather the following tools and materials
- Expansion bolts (appropriate size for your project) - Hammer drill (with a masonry bit) - Wrench or socket set - Measuring tape - Pencil or marker for marking - Safety goggles and gloves for protection
Step-by-Step Installation Process
1. Selecting the Location Choose the right location for your expansion bolt. Ensure that the area is clean, dry, and free from any debris that could interfere with installation.
installing expansion bolts

2. Measuring and Marking Use a measuring tape to determine the correct spacing and mark the spot where the bolt will be installed. It’s crucial to double-check measurements to ensure that the installation is accurate.
3. Drilling the Hole Using a hammer drill and an appropriate masonry bit, drill a hole into the marked spot. The hole should be slightly deeper than the length of the expansion bolt to accommodate the full length of the sleeve. Make sure the diameter of the hole matches the size of the expansion bolt.
4. Inserting the Expansion Bolt Once the hole is ready, take the expansion bolt and insert it into the drilled hole. Gently tap the bolt in using a hammer if necessary, ensuring it is seated properly.
5. Tightening the Bolt Using a wrench, tighten the nut onto the bolt. As you tighten, the expansion sleeve will begin to expand against the walls of the hole. Be cautious not to overtighten, as this could damage the material or the bolt itself.
6. Testing the Installation After you have installed the bolt, it’s important to test its stability. You can do this by applying a steady force to ensure that the bolt is secured and can withstand the intended load.
7. Finishing Touches Once you are satisfied with the installation, you can finish your project by attaching whatever object you intended to secure with the expansion bolt, such as shelving, brackets, or fixtures.
Safety Considerations
While installing expansion bolts is relatively straightforward, safety should always be a priority. Always wear safety goggles to protect your eyes from dust and debris, and gloves to avoid cuts and abrasions while handling sharp tools and materials. Ensure that your workspace is clear of hazards to prevent accidents during the installation process.
Conclusion
Installing expansion bolts is a valuable skill for anyone engaged in construction or home improvement projects. By following this guide and understanding the components and process involved, you can ensure a strong and secure installation. Whether you are hanging shelves, securing heavy fixtures, or undertaking larger construction tasks, expansion bolts provide the reliability and strength needed for long-lasting applications. Remember to always adhere to safety practices and double-check your measurements for the best results.


