Dec . 03, 2024 10:53 Back to list
installing sleeve anchors in concrete
Installing Sleeve Anchors in Concrete A Step-by-Step Guide
When it comes to securing objects to concrete surfaces, sleeve anchors are a popular and reliable choice. They provide strong holding power and are versatile for various applications, including attaching heavy fixtures, machinery, and structural elements. If you're looking to install sleeve anchors in concrete, follow this comprehensive guide to ensure a successful installation.
What is a Sleeve Anchor?
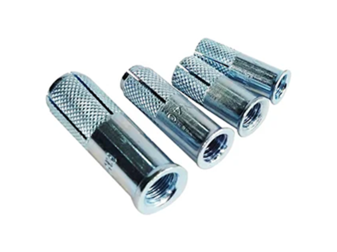
A sleeve anchor consists of a bolt and a sleeve that expands when the bolt is tightened. This expansion creates a strong bond with the concrete, making it ideal for heavy-duty applications. Sleeve anchors can be used in solid concrete blocks and are available in various sizes and lengths to suit different needs.
Tools and Materials Needed
Before you begin, you'll need the following tools and materials - Sleeve anchors (appropriate size for your project) - Hammer drill - Hammer - Wrench or socket set - Drill bits (specific to the diameter of your sleeve anchors) - Measuring tape - Marker or chalk - Safety goggles and gloves
Steps for Installation
1. Determine the Location Identify where you want to install the sleeve anchor. Ensure that the area is free from any obstructions such as electrical wires or plumbing. Use a measuring tape to mark the exact position where the anchor will be installed.
2. Drill the Hole Using a hammer drill fitted with the appropriate diameter drill bit, drill a hole into the concrete at the marked location. The hole should be slightly deeper than the length of the sleeve anchor to allow for proper anchoring. Ensure you keep the drill perpendicular to the concrete surface for a straight hole.
installing sleeve anchors in concrete

3. Clean the Hole After drilling, it’s essential to clear any dust or debris from the hole. This can be done using a blowout bulb or a clean cloth. A clean hole ensures better adhesion and holding power for the sleeve anchor.
4. Insert the Sleeve Anchor Take the sleeve anchor and insert it into the drilled hole. Make sure the anchor is seated firmly in the hole. The end of the anchor should be flush with the surface of the concrete, while the nut and washer should remain accessible.
5. Tighten the Nut Using a wrench or socket set, begin tightening the nut on the sleeve anchor. As you tighten, the sleeve will begin to expand against the concrete, creating a secure grip. Be cautious not to overtighten, as this may damage the anchor or the surrounding concrete.
6. Check for Stability Once the anchor is installed and tightened, check the stability by gently pulling or pushing on the attached object. It should feel solid and secure without any wobbling.
7. Finish Up If you are attaching an object, such as a plate or bracket, now is the time to do so. Align the object with the sleeve anchor and secure it in place with the included washers and nuts, if applicable.
Safety Precautions
Always wear safety goggles and gloves when drilling into concrete to protect yourself from dust and debris. Additionally, ensure that you are working in a well-ventilated area to avoid inhaling any dust particles.
Conclusion
Installing sleeve anchors in concrete is a straightforward process that, when done correctly, offers a lasting and robust solution for securing various objects. By following these steps carefully and taking necessary safety precautions, you can achieve a successful installation. Whether you're a DIY enthusiast or a seasoned professional, mastering the use of sleeve anchors will enhance your capabilities in construction and maintenance projects.


